Control breaks are used when records with the same control break value are to be grouped together.
Grouping records together is done by displaying a control header and footer whenever there is a change in the control break value. For example, Micronet displays a control header and footer whenever there is a change in the Debtor field.
As another example, a control break is used in your Monthly Sales Register to break the report when all the invoices have been printed (and totalled), then the credit notes, then journals. Each type is printed/totalled on the subsequent pages. In this case, the control break causes a page break.
To set the control breaks for your report:
Refer to "Creating a New Report", "Using the Report Wizard" or "Loading an Existing Report".
Micronet displays the Report Generator screen.
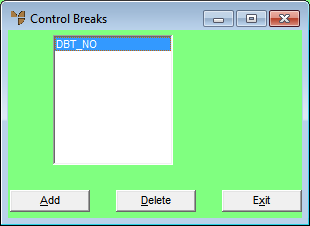
Micronet displays the Control Breaks screen.
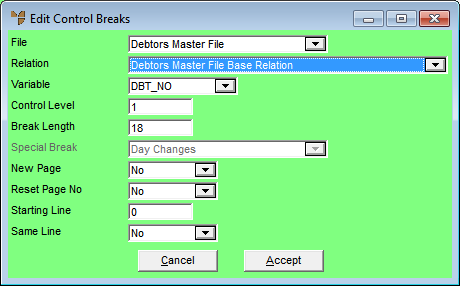
If you selected to add or edit a control break, Micronet displays the Edit Control Breaks screen.
|
|
Field |
Value |
|
|
File |
Micronet displays the main file for the report. |
|
|
Relation |
Select the relation where the field for the control break will come from. |
|
|
Variable |
Select the field which the break point will depend on. |
|
|
Control Level |
Enter the control break level for the data to be displayed. This will cause the control header and footer for this level to be displayed when there is a change in the variable field. |
|
|
Break Length |
Enter the break length. Micronet compares up to this length to determine if there is a change in value of the break point variable. |
|
|
Special Break |
|
|
|
New Page |
Select Yes if you want to create a new page whenever a break is required. Otherwise, select No. |
|
|
Reset Page No |
Select Yes if you want to restart page numbering whenever a break is printed. Otherwise, select No. |
|
|
Starting Line |
Enter the line number on the page where you want the control header printed. |
|
|
Same Line |
Select Yes if you want the detail section and control header to appear on the same Line. Otherwise, select No. |
Micronet redisplays the Control Breaks screen showing the control break you setup.
Micronet redisplays the Report Generator screen.
|
|

|
Technical Tip Once you have created a control break, you need to enter it as the Control Level for the appropriate field in the report, e.g. accumulator, variable or calculation. For more information, refer to "Edit - Add Field". |